Image may be NSFW.
Clik here to view. My 11 year old son is a Minecraft addict. If you don’t know anything about Minecraft you are obviously not a 10-12 year old boy or one the 11+ million registered users worldwide. To save you a Google search, it’s a multi-player game where you travel around artificial worlds digging, building and blowing things up. Just what young boys love to do… Each “world” is hosted by a server – and here’s the neat bit – anyone can setup their own server and share it with everyone or just their white-list of Minecraft buddies. Since it’s based on Java it runs quite happily on Windows, Mac or Linux boxes. As the server owner or “Op” you get to play god and do all cool god-like things … like editing your own world.
For the past few weeks my son has been hassling me to build a public Minecraft server to share with his Minecraft buddies and I of course have declined – trying to explain the risks of opening our home network to the world to an 11 year old who just didn’t understand. Finally last month, I relented (of course) and decided to at least find out what would be involved. The recently retired Compaq R3000 laptop was looking for a new job and seemed well suited for it.
You can run a Minecraft server on Windows but running a GUI on such a small machine seemed a waste. Instead, I decided to use the latest version of Ubuntu server. I chose to use the USB install method hoping to speed up the install process. This was simple enough and within an hour we had a nice new login prompt. Following the instructions on the Minecraft wiki, we managed to get the Sun version of the Java runtime environment installed and then we proceeded with the Minecraft server install itself. Pretty soon we had a working private Minecraft server. Using the private IP address, the client connected and we were Minecraft “gods”. The next step was to make it public… A step which I baulked at again as I really did not want a whole stack of young boys poking around in my network.
Cloud computing to the rescue.
Then I had a brainwave. These days you don’t need to actually have a physical server to operate a server. You just need access to one on the internet. This is what cloud computing is all about. The “cloud” of course is the internet. I am sure all the MBA types will give you some great sounding technical hogwash as to why it’s called the cloud. But the facts are far more interesting. You see, the reason it’s called “cloud” is because that’s the pictogram nerds like me used for the telephone network and then the internet in system diagrams - the internet (as was the telephone system before it) was just a big amorphous cloud that you connected to – management types did not need to know the details – hence the cloud – metaphorically obscuring the details. Nerds may have a weird sense of humor but it is something we all “get”. Truly.
Amazon started selling books on the internet. Now they sell just about anything to anyone anywhere in the world. This includes virtual storage and virtual computer servers – the basic infrastructure of cloud computing. Amazon have all these stupidly meaningless acronyms for their cloud products that make no sense at all other than to scare off potential customers. Nerds have a way of making others feel incompetent and using stupid acronyms is just one favourite trick. Amazon must be full of really good nerds because they have really excelled in acronym generation. For beginners though the only two acronyms you need to remember are
- EC2 = Elastic Compute Cloud = virtual servers
- S3 = Simple Storage Service = virtual storage
For our Minecraft server, we will be using EC2.
With Amazon EC2 you can setup a server in the cloud. Once created it’s yours to do with as you please – you just pay for the storage and computer cycles you use. Amazon offer lots of different server types and flavors each with their own price point. At the lowest end though is the ”free tier” micro server. The free micro servers on Amazon EC2 are Linux based machines with 613 MB and 10GB of storage. As a new Amazon Web Services customer you can setup, play with and test one of these for a year for free. So essentially Amazon is offering the processing power of a netbook to anyone for free for a year.
I had already set up one of these free virtual servers just for fun. It all worked (of course), but when push came to shove I could not find a good use for a free, small and pretty slow Linux box in the cloud. So I shut the server down and waited for an idea. I think you can see where this is heading…. I had already proved the process for building a Linux based Minecraft server on an old notebook. Doing the same thing in the cloud with an EC2 micro server is pretty straightforward. So here’s the first steps to making a free Minecraft server in the cloud:
1. Sign up for Amazon Web Services (AWS)
This is easy. Type AWS into Google and select the first result. On the AWS home page, click the sign up now button. If you already have an Amazon you can use it here or create a new one.
2. Sign up to EC2
Before you can create a new server you need to signup to the EC2 service separately. At this point, Amazon do some funky identity verification and prompt you to enter a phone number their computers can call you on so you can enter PIN they disply to you.
3. Create your virtual Minecraft Server
From the EC2 dashboard click the big button that says “Launch instance”. You will then be presented with the first of many pages of the new instance wizard.Image may be NSFW.
Clik here to view.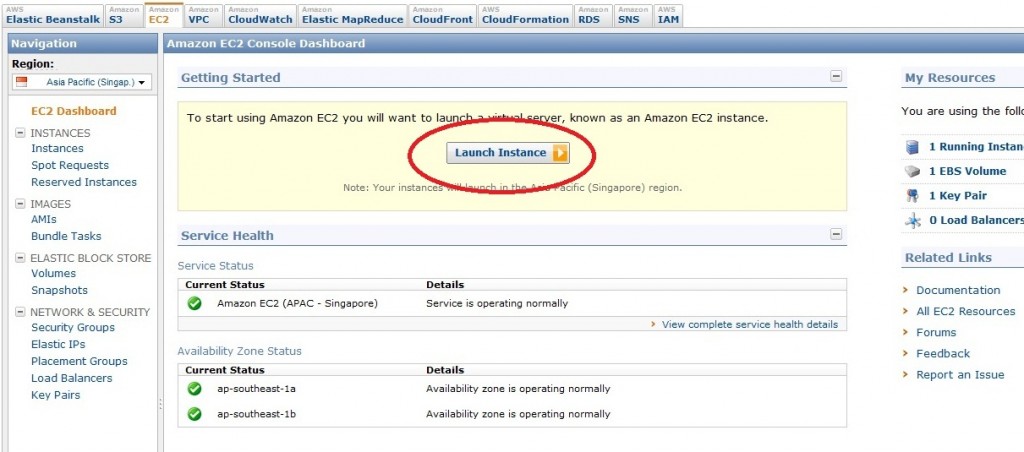
a. The first page asks for type of server you want to make. Choose the first one. It’s the standard Amazon Linux server.
Image may be NSFW.
Clik here to view.
b. The next page asks you how big you want to your server to be. Make sure you select Micro as that’s the only one which is free.
Image may be NSFW.
Clik here to view.
c. The next page is the advanced options. None of which we care about. Just click continue.
Image may be NSFW.
Clik here to view.
d. The next page lets us add some tags. Really just fancy ways to identify your server. You can use my example if you want. As you are probably going to have only one server, it doesn’t matter what you type in.Image may be NSFW.
Clik here to view.
e. The next page is important. You will need to create a new key pair. Amazon EC2 does not use user names and passwords for “root” access. Instead they use keypairs. You don’t need to know the details other than once you create the keypair file, protect it as its the key to your server, anyone with access to it can login to your server. Save the keypair file in safe place – we will need it later.
Image may be NSFW.
Clik here to view.
f. Now you need to create a new security group. A security group is Amazon’s term for the firewall settings on your server. The settings decide which packets are allowed in and which are not. We are only going to allow two types of connections – secure shell (22) and Minecraft (25565). Once you are done your screen should look like mine.
Image may be NSFW.
Clik here to view.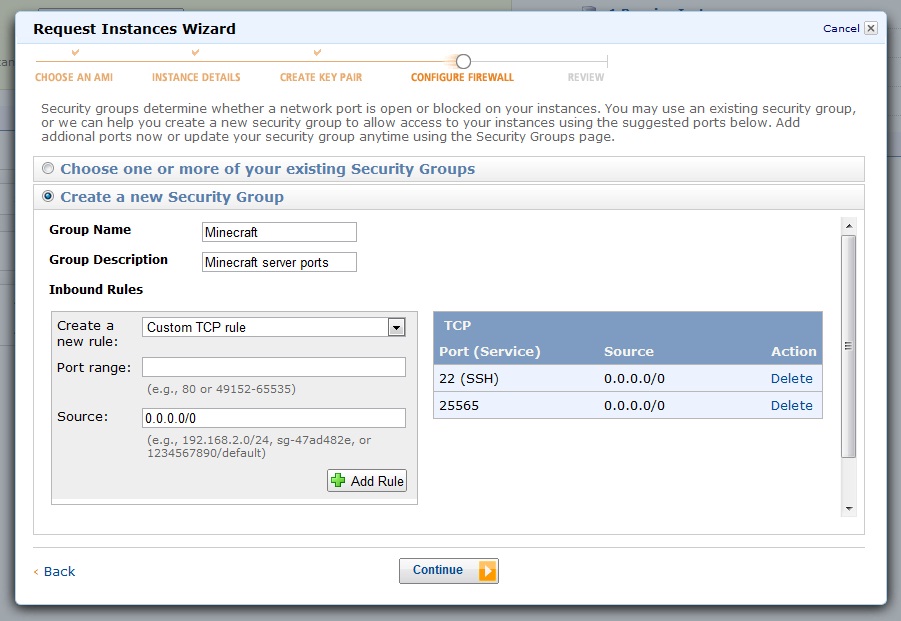
g. Time to launch. Click launch.
Image may be NSFW.
Clik here to view.
h. This is just a stupid screen that serves no purpose. Close it.
Image may be NSFW.
Clik here to view.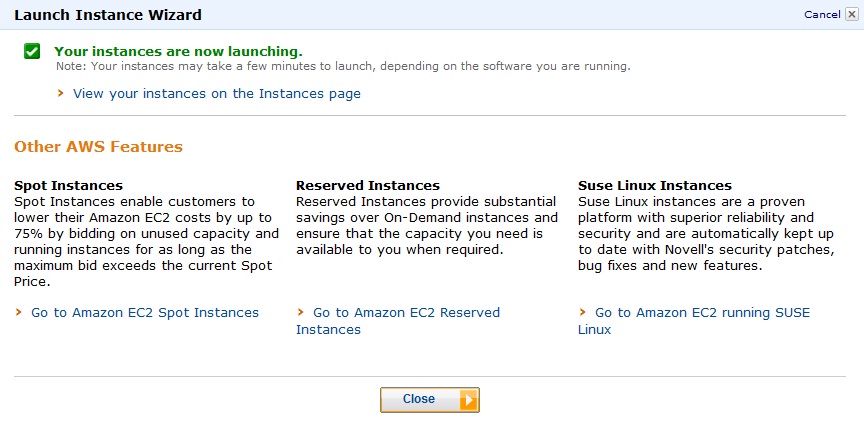
4. Create and assign your server an IP address
Now we have a server created and running in the cloud but we have no way of talking to it. To do that first we need an IP address. Amazon have really silly names for everything. It really makes you wonder why they still call books “books” rather than paper based reading devices. Anyway their stupid name for IP assignment in the cloud world is Elastic IP.
You will see the Elastic IPs option on the AWS dashboard towards the bottom under Network and Security. Click it and click allocate new address.
a. You will be prompted to confirm you really want to allocate a new address. Click yes. In a few seconds you will be allocated a real IP address.
Image may be NSFW.
Clik here to view.
b. Now you need to associate the new IP address with your Minecraft server. Click associate address and select your minecraft server from the dropdown list.
Image may be NSFW.
Clik here to view.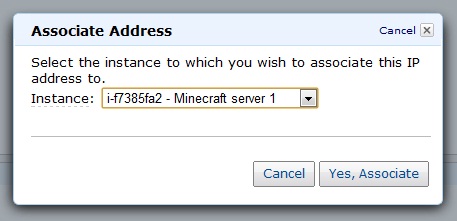
Record your IP address. This will be the address you give all your Minecraft buddies.
In the part 2 of this series, I will explain how to securely connect to your new server and install Minecraft. In part 3, I explain how to setup a Small Instance server but not spend too much.